


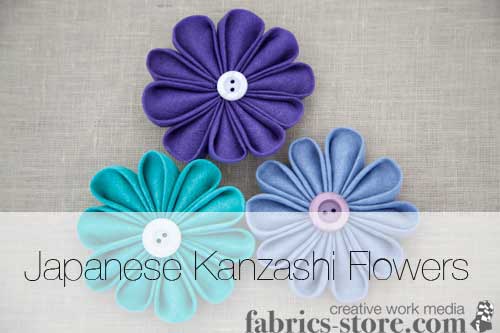
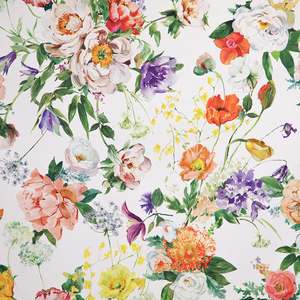
Japanese Kanzashi Fabric Flower Tutorial

Today we are making beautiful Japanese Kanzashi folded fabric flowers. ‘ This is our own interpretation of this artful fabric origami where we choose linen as our primary material.
What is Kanzashi?
Kanzashi flowers are a Japanese art form that are traditionally made with honotai silk to give them a dazzling color and lovely texture. ‘ However, many modern versions of these delicate flowers are created with a wide range of fabrics.
Kanzashi are typically worn as decorative hair ornaments in traditional Japanese hairstyles. ‘ Brides and geisha participating in tea ceremonies to this day can be seen wearing this elegant accessory. In fact, the style and manner in which kanzashi are worn indicate a geisha’s status.
Some people even collect kanzashi because they possess a unique beauty and are significant to historical Japanese culture.
You can embellish your Kanzashi in whatever style suits your taste. ‘ Feel free to experiment with a variety of fabrics to achieve different textures. ‘ Coordinate colors to match different occasions or celebrations. Adding a button or decorative jewelry to the center is another way to jazz up your flower.
Now that we know a little bit more about Kanzashi, we can begin our craft! ‘ Remember, ‘ creating a beautiful Kanzashi flower requires some practice (and patience!). ‘ Keep trying and you will get the hang of it in no time.
There are a many different methods to making these flowers. ‘ Today, we will cover just one way to make Kanzashi. ‘ After you master this method, you can experiment with other petal forms, sizes, and techniques.

Materials:
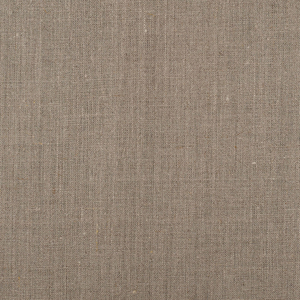
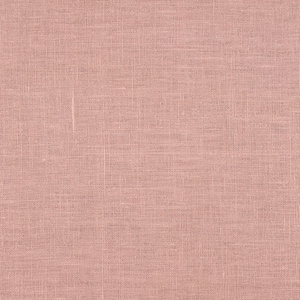
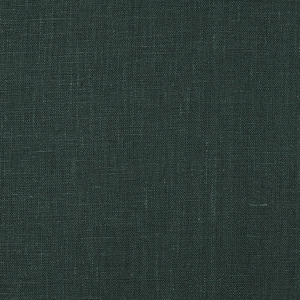
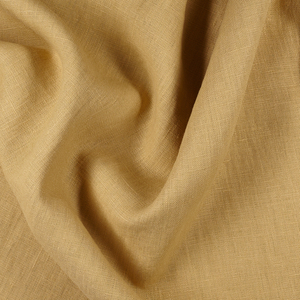
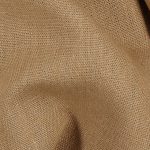
- Ten (10) 3″x 3″ squares of IL019 100% linen fabric
- ‘ Iron
- Needle
- Matching Thread
- Pins
- Scissors
- Buttons
Kanzashi Tutorial:

Begin with a square of 3″ fabric. I recommend starching and ironing your fabric before, as it will be easier to work with and leave you with a neater finished product.

Fold this square in half diagonally. Hold the triangle with the open end pointing up.

Fold the bottom left corner up to the center peak.

Then fold the bottom right corner up to the center.

Flip your fabric over and fold the outer corner in (left and right) so that they meet in the center.
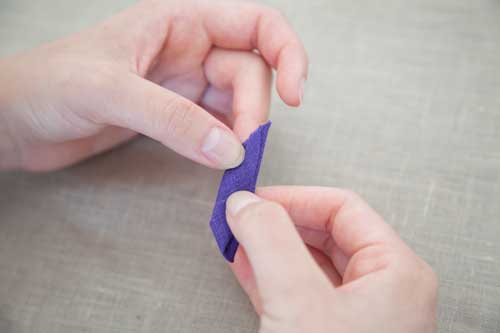
Fold your fabric in half.

The folded corners should be tucked in.

Pinch the folded fabric together. ‘ Put a pin through the petal, making sure to go through the smaller triangles, to secure it.

Clean up each petal by trimming off the triangle on the open end, creating a straight edge. This will be the inner side of the flower, where the petals will meet at the center.”

Repeat with all of your 3″ squares.

Now that your petals are clean and ready to go, thread your needle. ‘ I like to double up on the amount of thread for more reinforcement.

Pull the threaded needle through the first petal near the base.

Do not knot your thread at the end. ‘ Instead, leave about 5 inches to work with later. ‘ Thread all the petals in the same spot.


Some extra tips:
- Make a smaller flower to glue on the center of your flower for more dimension. ‘ Just cut the squares smaller (for example, 2″ squares ‘ this 3″ base).
- Choose a different shades or patterns for even more style.
- Add a button to the center to complete any Kanzashi.
Other Ways to Use Your Kanzashi:
Kanzashi are traditionally worn as hair ornaments, but you can use them in so many other ways.
With a few stitches or some glue you can:
- Attach a flower to a purse for a fashionable vintage look.
- Sew flowers to the bottom of a scarf.
- Stitch a flower onto a knitted hat or to the brim of any hat.
- Attach a flower to a pin and wear it as a brooch.
- Decorate pillows by attaching flowers to them.
- Make a flower arrangement for an adorable centerpiece.
- Sew flowers along a piece of grosgrain ribbon for a unique garland.
- When wrapping gifts, use them instead of bows!
*Have fun making Kanzashi flowers! ‘ Remember, they take just a little bit of practice, but you’ll love the results. ‘ Let us know how your flowers turn out and what you like to decorate with them. ‘ Visit our Facebook page for more crafts, ideas, and more.

Leave a comment
Related posts
Tutorial: How to Make Fabric Buttons
If you’ve ever considered trying fabric covered buttons, this is one of my favorite projects and I am delighted to encourage you to try them. I hadn’t made the buttons with linen before so I was so excited about this project. When I first made fabric covered buttons years ago, I chose cottons with tiny…

From Farming to Folk Art: Sara Buscaglia
There is a remarkable symbiosis between Sara Buscaglia’s life and work; she seamlessly blends her charmingly old school textile art – mostly exquisitely handcrafted quilts, but also knitting and clothing – with running a successful and prolific organic farm, where she is currently raising a family of four children alongside her husband. Based in La…

Tutorial: How to Trace Off a RTW Garment
You know that one well-worn, probably damaged-beyond-repair item in your closet you bought off the rack ages ago that you still hold on to because you just love the way it looks and fits? Or maybe it’s a garment you think would look amazing in another fabric that the original wasn’t offered in? Well, have…

Tutorial: How To Make A Quilted Linen Vest
A few years ago, I started to play with quilting clothes. The first few pieces turned out less than ideal. I didn’t know the paths to avoid the foibles of quilting. But after a few playful experiments and failed garments, things started to fall into place. I’ve put together this tutorial to share the things…

Tutorial: Valentine’s Day Treat Bags
Most people usually say their favorite holiday is Christmas. Occasionally, you’ll hear someone claim New Year’s Eve, some may say Thanksgiving… but mine is Valentine’s Day, without a doubt. All the pinks and reds, laces and ruffles, themed treats and gifts; it’s so much fun! As a maker, I find myself always looking for opportunities…


SEW THIS LOOK


Latest Posts


48 Comments
Pingback:
Weekly Sewing Projects – Deborah Sampsonann reaugh peck
Could you make a chrysanthemum bloom with the spoon shaped petals by starting with 7 inch squares, then an inner circle of five inch and then three inch?
Patricia Welsh
Love the flower and will try soon. My use on a quilt I am making.
Brenda P
What an incredible loopy belt those would make!
Dahir
Esta todo en ingles pliss me gustaria poder leerlo.
Beebe
Tried these today out of 4 inch quilt squares I had left over. Great flower, super easy!!! Thank you!!!
Gwen McDaniel
Since I mostly make dresses, quilts, and sometimes dolls… I was wondering if I could adore those with these sweet little flowers. Good luck to me. Thank you very much for the pattern and directions.
Gigi
Awesome!! Thanks for a great tutorial!
Barbara barner
Great tutorial. Thanks so much. Beautiful flowers just what I was looking for.
Linda Lambert
Thanks am going to try this.
Bertha
Will be trying these.
Mary Handy
Thank You very pretty
Cathy McClellan
Thanks, I love the flowers!
Ronny Triphahn
Is there a video to watch?
Emily
These are so cute and seem so much more easier, I used to make flowers the hard and long way. but now that I see this its like you can make so many more in less time. Thankyou for this awesome tutorial
Nancy Ovenshire
Would you be able to send this to my email also. Looks so pretty. Thanks
betty
thank you for the free tutorial!!
Donna Benner
My granddaughters love their new flowers for their hair. Thank you, east to make.
jjinyancey
I’m wondering: if you make these petals a little larger, could you run them through your serger (being very careful, of course)? Looks like that would perform the cut on each one, and the serger stitches would also hold the pleats together on each petal. Anyone want to try it?
Lynne
I’m going to try this.
Kathy
I’m having a little trouble keeping the little ends tucked in on the back. I cut off the little triangle as instructed, but then when the flower is constructed, the folded edges on the back have a tendency to pop out. what can i do to prevent that? These are ADORABLE and I’m using scraps of quilting fabric and rummaging through the button jar. 🙂 Thanks!
judy francis
PLEASE SEND PATTERN TO E MAIL THANKS SO MUCH
marisa
Is there any way that I could get this sent to my email. My printer has left me and I don’t know how soon I can get a new one.
Please and thank you! Love the flower!
Michaela Smith
Hi Marisa! I’ve just sent you an email with the pattern. 🙂
Linda
I don’t know if you have solved your problem but I would just copy and paste the instructions to an email and send it to yourself. Hope this helps!
Jenny
Gracias por compartir sus conocimientos, sabes no tenia tela a la mano par aprender los pasos… asi q las hice con papele hilo, aunque no es lo mismo claro esta, pero se ven muy bien muchas gracias se veran hermosas hechas de tela en un bolso de jean!!! 😀
Marta
Beautiful, thank you!
angely malave
thanks for your flowers were beautiful and I made
lore
son preciosas gracias por compartirlo
Sue
Thanks for the instructions for the flowers. I will try to make one this evening. I appreciate the time it take to do the instructions
Ana Maria
Hace tiempo estaba buscando algo asi para mis bandas tejidas. Pero la textura de la tela que se usa, importa?. Me encantan las manualidades. I was looking for something like this to use in my crocheted headbands. Does it matter the texture of the fabric u use? I love crafts!!
Carole
Love getting the projects! It made me look!
Keep them coming!
Thanks
printable coupons for hancock fabrics
I enjoyed every step of making a kanzashi flower.. It was really nice idea. Thanks for posting it
countryswan
I am going to decorate a birthday gift with these glued to the wrapping. these are sooooooo delightful. THANK YOU for sharing!!
Lisa
I just discovered your blog today, via your web site, must say it is surprisingly wonderful, love your photos and subject choices. More interesting than typical sewing blog. I subscribed via RSS feed. Thank you for flower idea, I am making a summer dress for my niece and this is perfect.
Margarida Porto
Adorei o tutorial. Já fiz algumas flores para enfeitar minhas almofadas. Obrigada.
Beijos
I loved the tutorial. I’ve done some flowers to decorate my cushions. Thank you.
Kisses
nicole novembrino
@Wendy- I haven’t tried many other Japanese crafts, other than basic paper origami. I do love all things Japanese though!I’ll try to find more Japanese crafts for future posts.
@Gretchen- Just cut the extra triangle at the bottom off. This will be the open end, not the folded top piece. Don’t worry you are having trouble forming the flower after sewing. That is more of the more tricky steps! Just gently tighten your knot until all the petals come together nicely. You might have to adjust them with your fingers so they lay just right.
@Pat- I used IL020 for these flowers.
@Bethany- Thanks for your wonderful explanation of Kanzashi!
Bethany
Marlaine, the first Kanzashi (hair ornaments) were rods or sticks used 14,000 to 300 BCE. It doesn’t say specifically when the fabric kind started. If I had to guess I’d say it tracks the development of geisha around 1600. They seem to wear a lot of them and have different styles for each season/holiday. If you know Japanese, there is a link to another site in the references of the Wikipedia article which might?? give us more info.
They call this kind Tsumami Kanzashi – literally, ‘folded fabric hair ornament’.
“Tsumami kanzashi are made from tiny (usually 1″) squares of silk which are folded into petals using origami techniques. Flowers are made from these folded fabric petals and may contain anywhere from five petals to 75 or more, depending on the particular flower made. A ‘hana kanzashi’ is a cluster of these flowers, and may or may not include bira-bira and/or long streamers of tsumami petals, fashioned to look like hanging wisteria petals. Generally, hana kanzashi are worn in pairs, one on either side of the head, often with a complementary kushi and/or with several individual flowers scattered about the hair.” – Wikipedia
Pat Miller
Question: m mWhat weight linen did you use?
Pat Miller
How very pretty. I’m already planning to make some and then teach my sewing group how to make them. Pat
Marlaine
do you have any idea of when this style of flower was first used…like historically?
Gretchen Kelley
Love the flower. Tried to make one this aft. Not sure how much to cut off of each petal. Seem to be having trouble getting flower to take shape after sewing together. Please add a few more directions. May I suggest to others that you line up the petals with same side up before starting to sew together. I accidentally added one petal backwards when momentarily distracted. Oh well!!
Kay Stanton (australia)
love getting the craft projects. I share them with all my crafty friends down under. Doing them in japanese prints look great. thanks
Wendy McNeil
Nicole have you done any other Japanese crafts? this flower looks great and quite simple
nicole novembrino
Thanks Susan. The button is an optional addition that you can attach with glue (hot glue works well) or sew on.
Susan Cottrell
You forgot to explain how to attach the buttons.
Solveig
Fabulous ideas!
I’m already thinking to put a jeweled button in the center.
Saritha Machado
Very cute flower craft.I want to try.